

Sewing Studio Part 3
All the details on my new sewing space!

A little over seven months of planning, building and designing and we’re here! I finally get to share what I have been dreaming up. This studio was a big investment in myself, and a big step toward being more open in sharing my sewing practice. I am so proud of the work my husband and I did on it (seriously, Andrew THANK YOU, I love you so much. You made my sewing space dreams come trueee.)

When designing this space, I had a list of things I definitely wanted to incorporate:
Desk with a big window above it for my main sewing machine, Juki TL-15.
A second desk so my serger and embroidery/sewing combo machine could always be set up and ready to use.
Enough space to comfortably host small classes or private sewing lessons.
Cutting table in the center, big enough to trace patterns and easily cut fabric. (I wanted to make sure there was lots of space to walk around this, as well.)
Lots of storage! I searched high and low for storage options.
Comfortable chair for unpicking seams, writing posts, and Andrew to spend time with me in the studio. :)
Good lighting! (I won’t talk about lighting much in this post, but the large window, 5 smaller windows, and 8 evenly distributed recessed lights make it so I can work in here any time of day/night.)
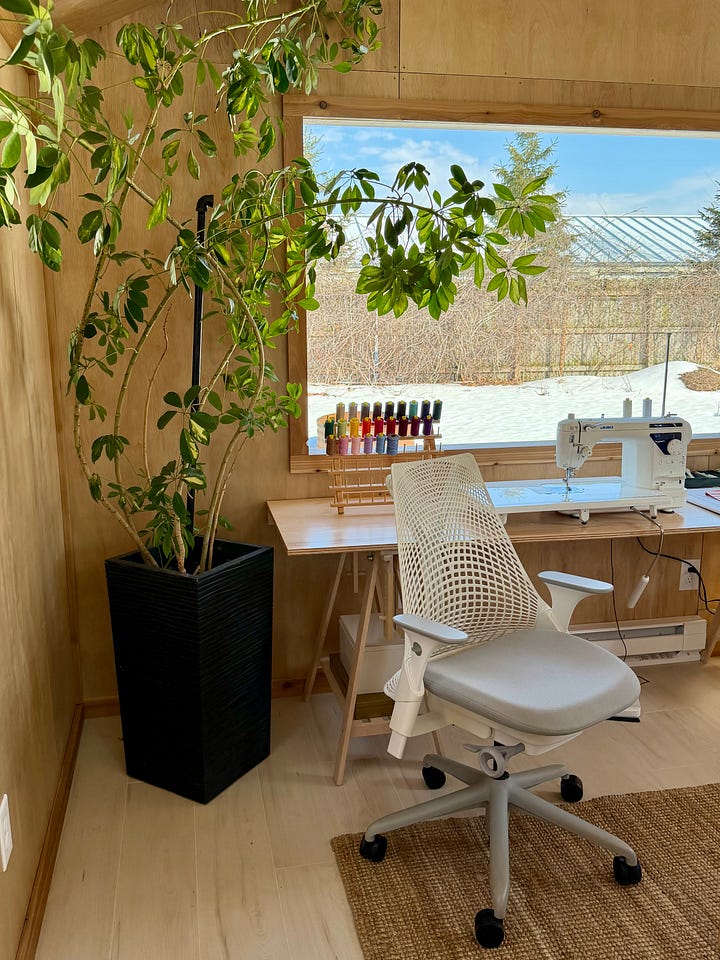

I was lucky enough to find this mannequin at a local sidewalk sale last summer My main desk is 7 feet long and held up by two Ikea Mittback trestles. On either side is my Schefflera plant that I rescued from a dumpster almost two years ago (lol, fingers crossed it adjusts happily to the new space and lighting!) and a mannequin I found at a local sidewalk sale last summer. The mannequin is a bit smaller than my actual measurements, but nonetheless, super thankful to have it to showcase what I’m working on! (Sneak peak at the recycled denim quilt coat I just finished up, more details later!) This corner also has a small basket for scraps and a rolling cart with some ironing supplies/boards.
I will also be making and adding curtains, and adding some sort of protectant film onto all of the windows to protect from UV rays/fading. If anyone has a recommendation of what to use, I’m still researching my options for that, and since sunny days are few and far between where I live right now, I have a bit of time. (I took these photos on one of our first sunny days in awhiiiile.)
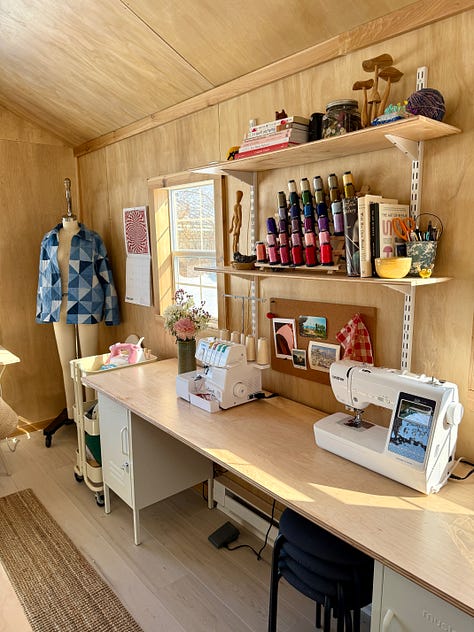
The second desk is also 7 feet long and is held up by two small Mustard Made lockers for more storage. Each locker holds accessories for each of the machines, and have plenty of empty space to fill up over time. I love having my serger set up and ready to go anytime I need it, and I’m looking forward to always having my combo embroidery/sewing machine set up as well so I can incorporate embroidery and decorative stitching into my work more often.
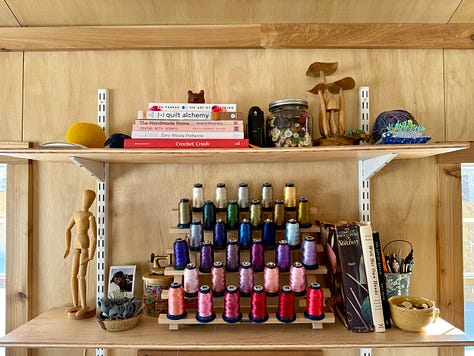
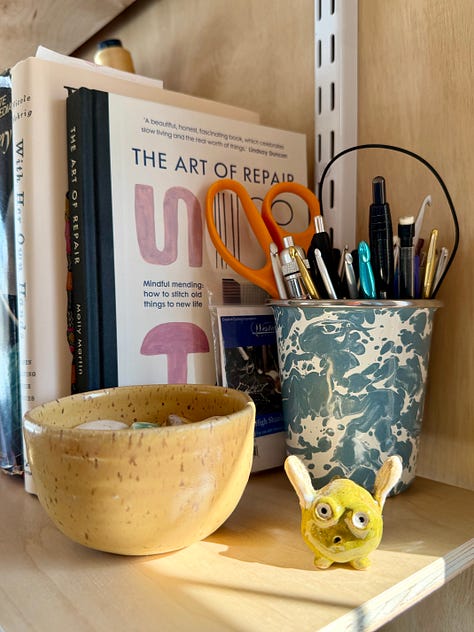
The shelves are great storage for some of my books, pin cushions, embroidery thread, buttons and found knickknacks. I also added a small cork board above the desk that could hold inspiration or class details for when I teach classes in the space! My hope is to teach classes of 2-3 students at a time in the near future, or do private 1 on 1 sewing lessons! The amount of people who have asked me about this feels exciting, and I hope to start that sometime this year for those who are local to me.
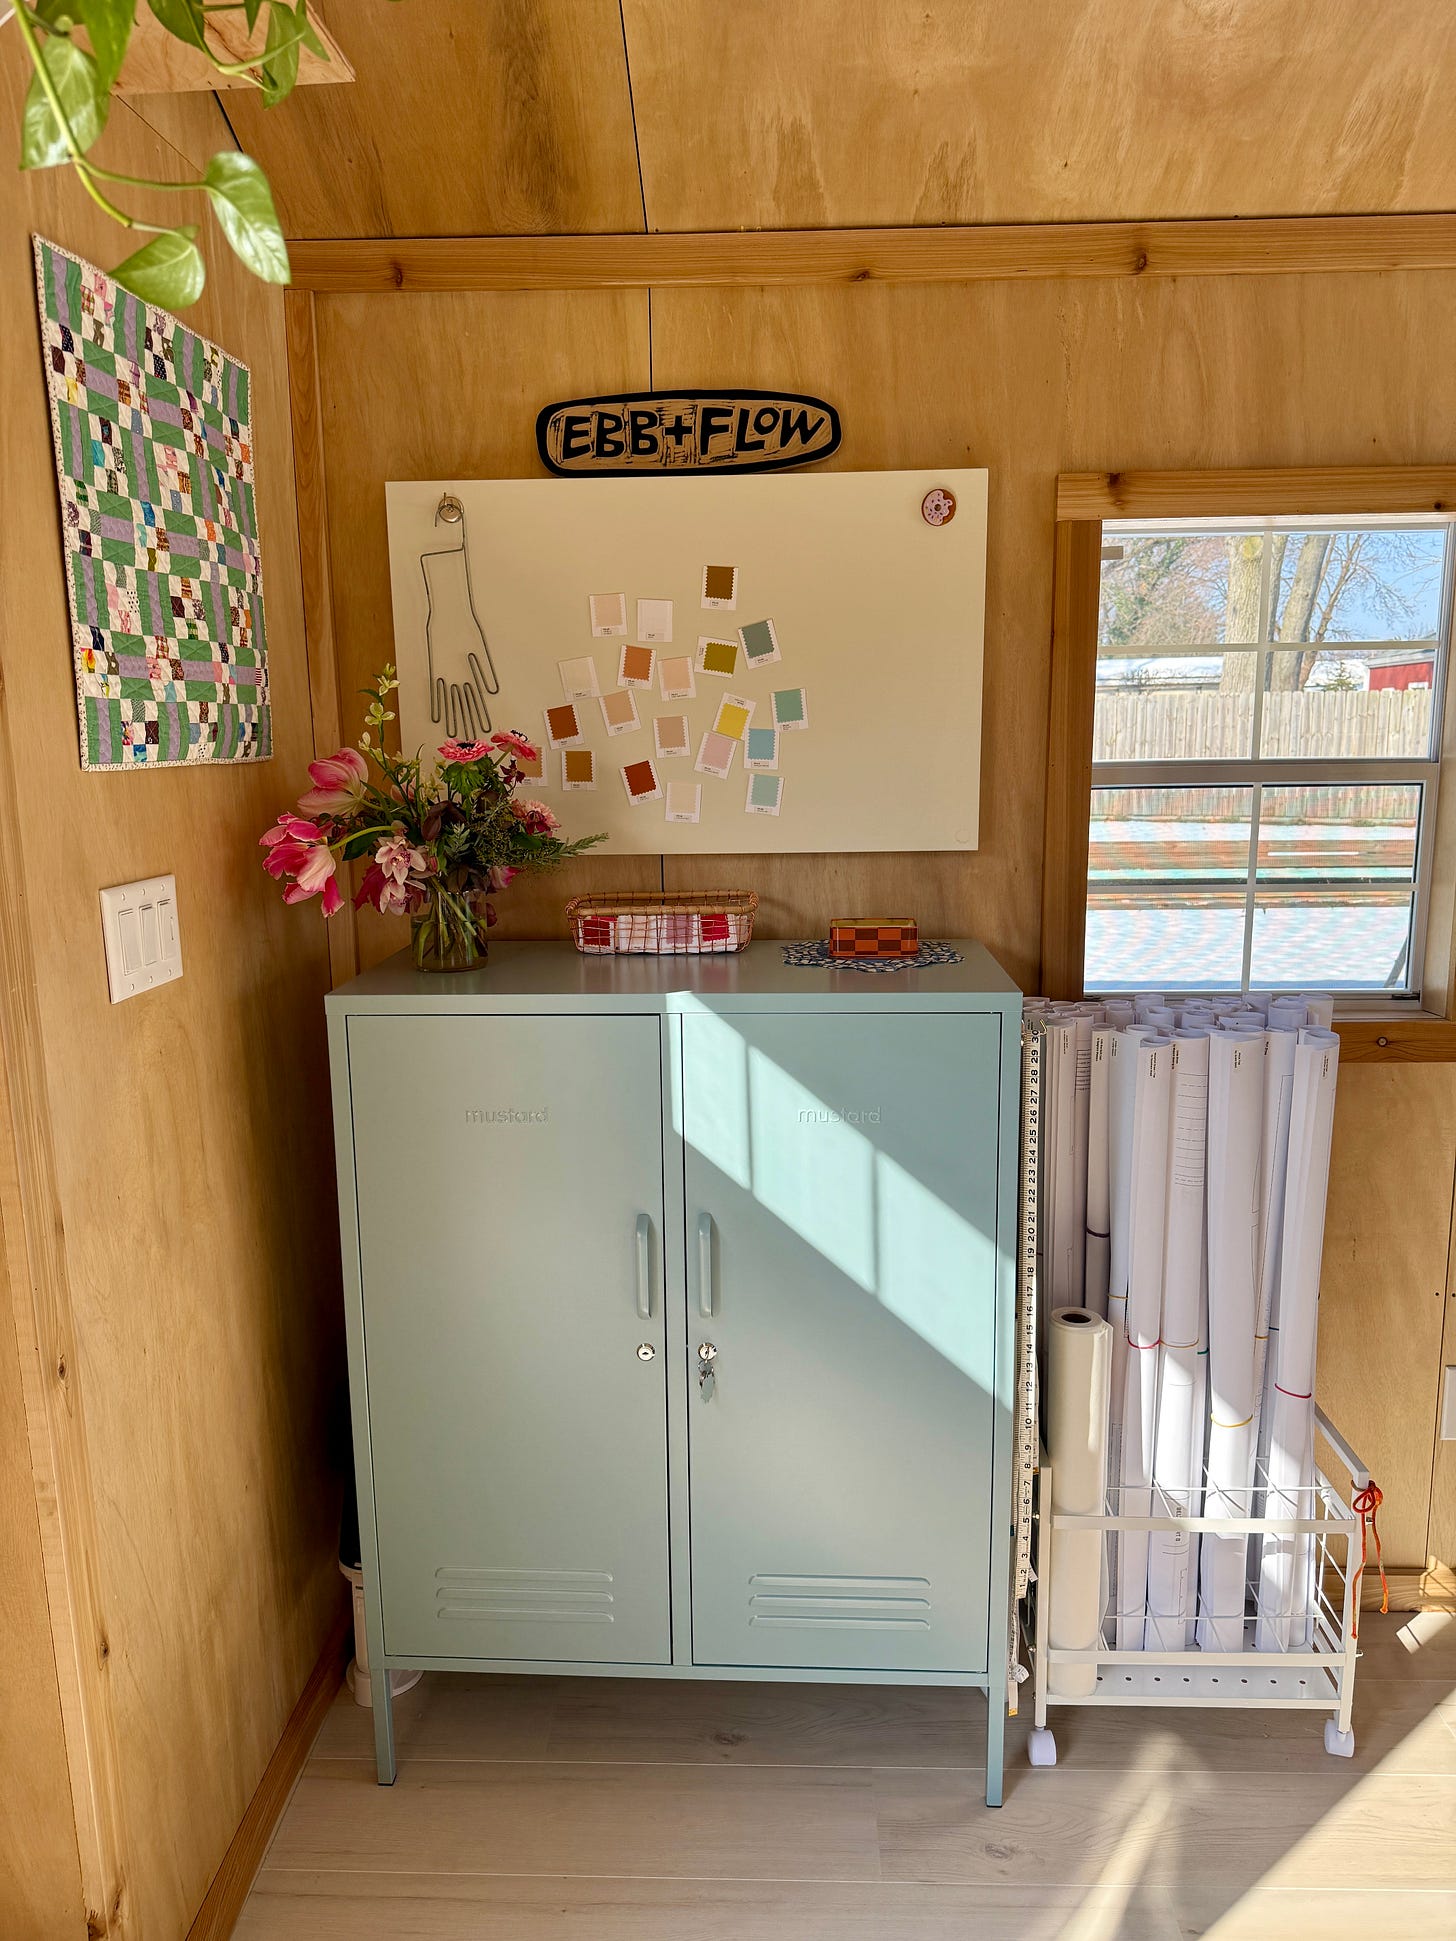
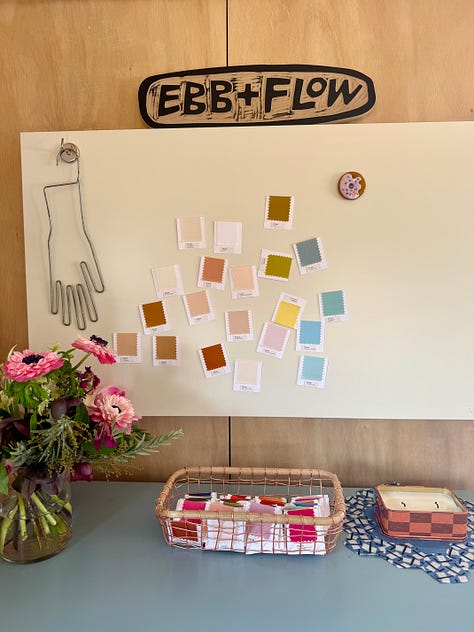
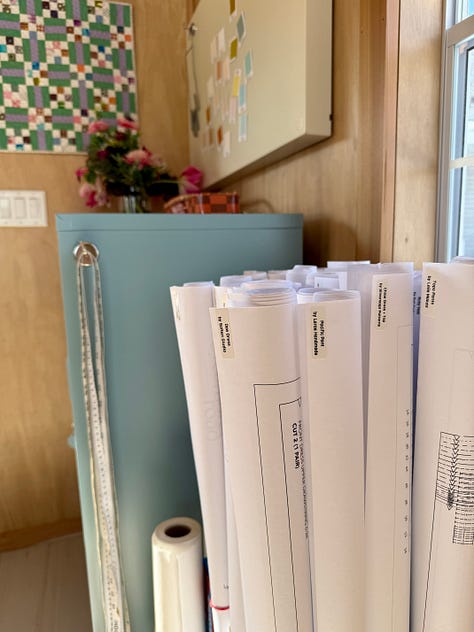
I searched high and low for good storage solutions for the studio. I kept coming back to this Mustard Made locker and finally decided on the Ocean blue color to help balance out the warmth of the wood. It’s one of the only new pieces of furniture I bought for the space, and I am obsessed with it. To the right of the locker is a rolling rack that I keep all of my A0 patterns rolled up in. Above the locker is a large magnetic board also from Mustard Made (they call it the Storyboard) to hold inspiration and my AGF Solids fabric swatch magnets. I made these last summer to help me create color stories for future projects. I’m sure there are plenty of tutorials online, but if anyone is interested in how I did it, let me know!
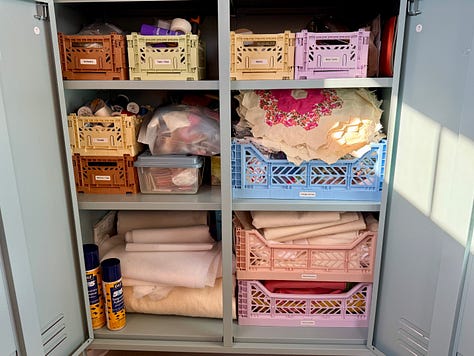
Inside of the locker I used Hay storage baskets and labeled them so they (hopefully) stay organized. I feel like this locker is small(ish) but fit a lot more than anticipated. I’m able to store all of my bag hardware, zippers, snaps, tape, glue, various sizes of elastic, misc tools, lots of thread, all of my buttons/tags/notions, a huge portion of my Vintage textile collection, fabric remnants from past projects and batting/505 spray for quilting.
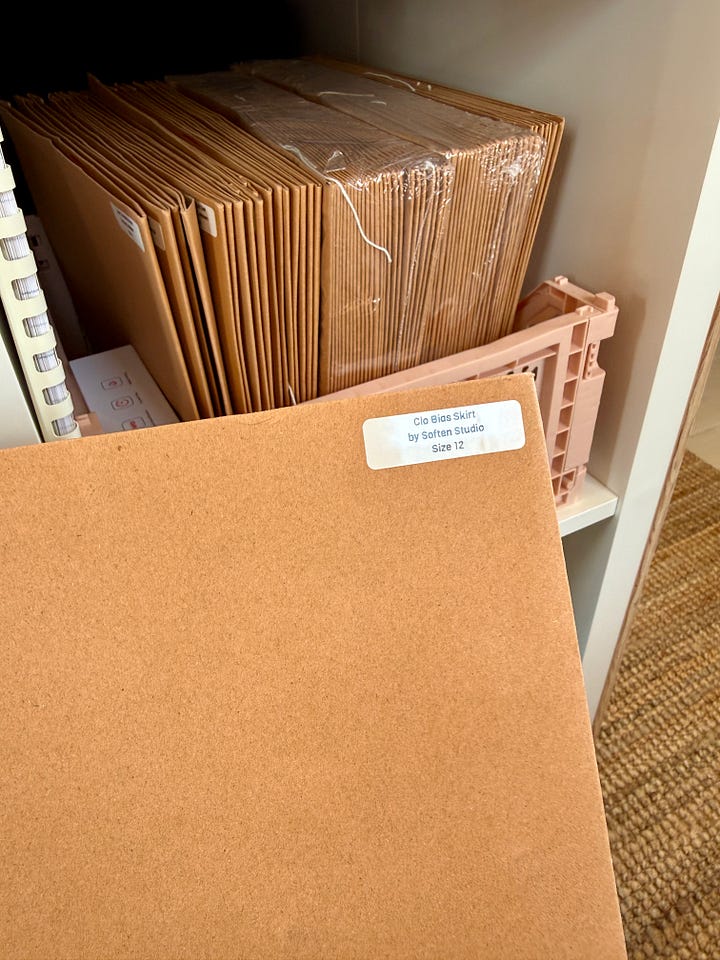
I had a few people ask me about my A0 storage after my post, The Joy of A0 Patterns (if you’re interested the post is linked below!) and the rolling rack is the best solution I’ve found that takes up minimal space. I’m currently able to fit 30+ patterns with room for more (3-4 patterns can fit per section, if I roll them tightly). I label all of them using my label maker with the name of the pattern and pattern designer so I can easily find the pattern I’m going to trace next.
The cutting table is my favorite part of the studio. I went through so many different designs before deciding on this one, and Andrew built and executed it perfectly. I knew I wanted lots of fabric storage within my cutting table, so I started with two Ikea Kallax shelves attached, then covered them with maple plywood on all sides, and added wheels to the bottom so it could be easily moved. We added a curved layered shelf (inspired by a past project Andrew did for our kitchen counters) on one end for more storage and is currently being used to store some of my rulers, and another sewing machine.
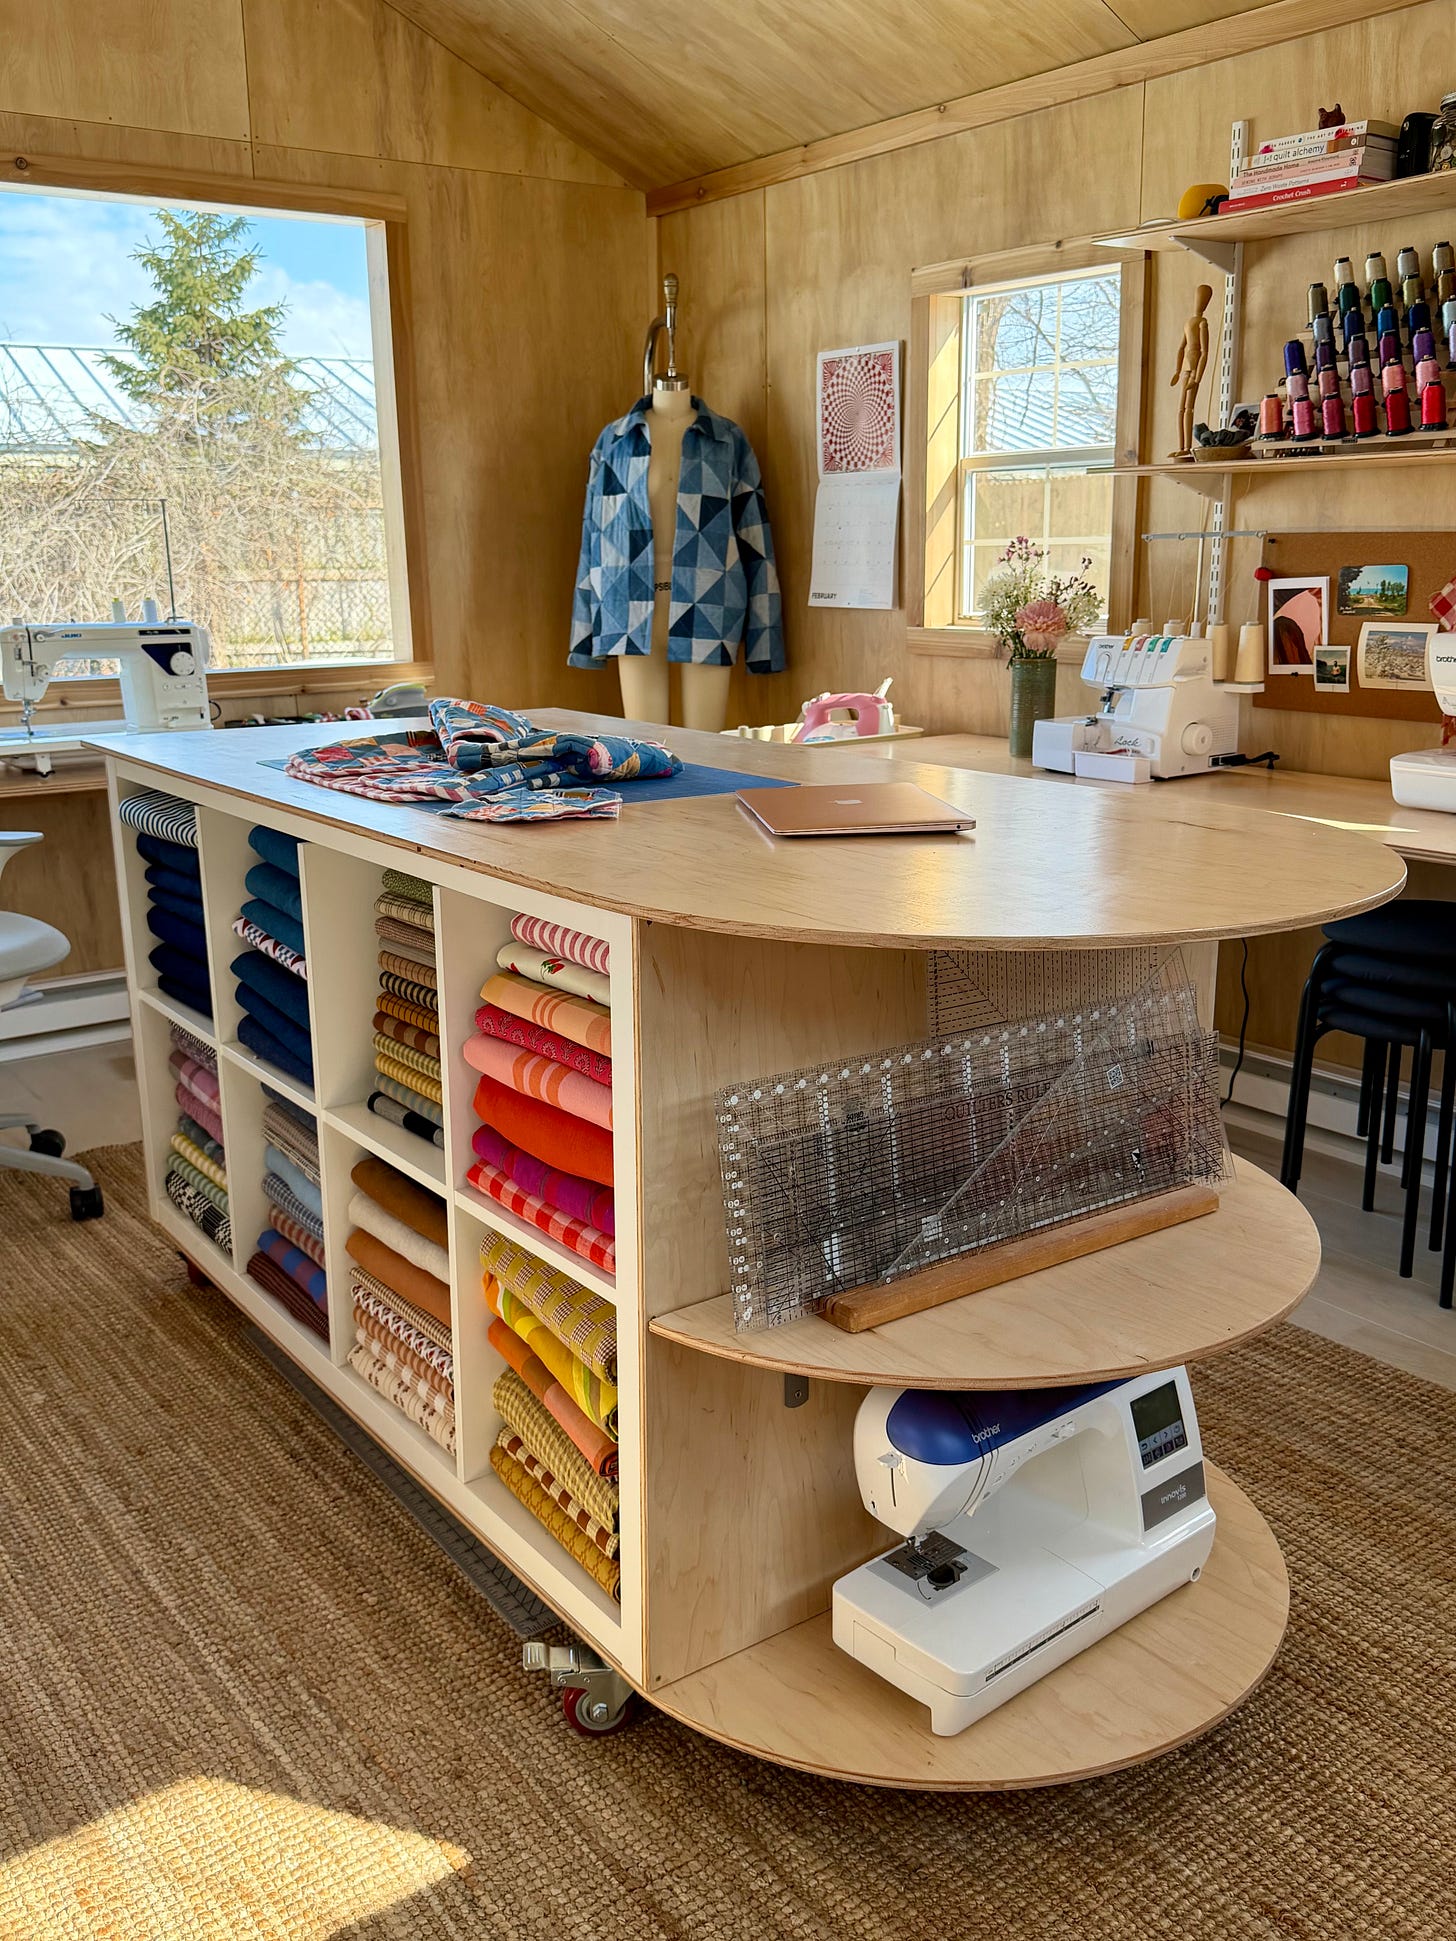
The sewing machine pictured was inherited from my Grandma who first taught me to sew. 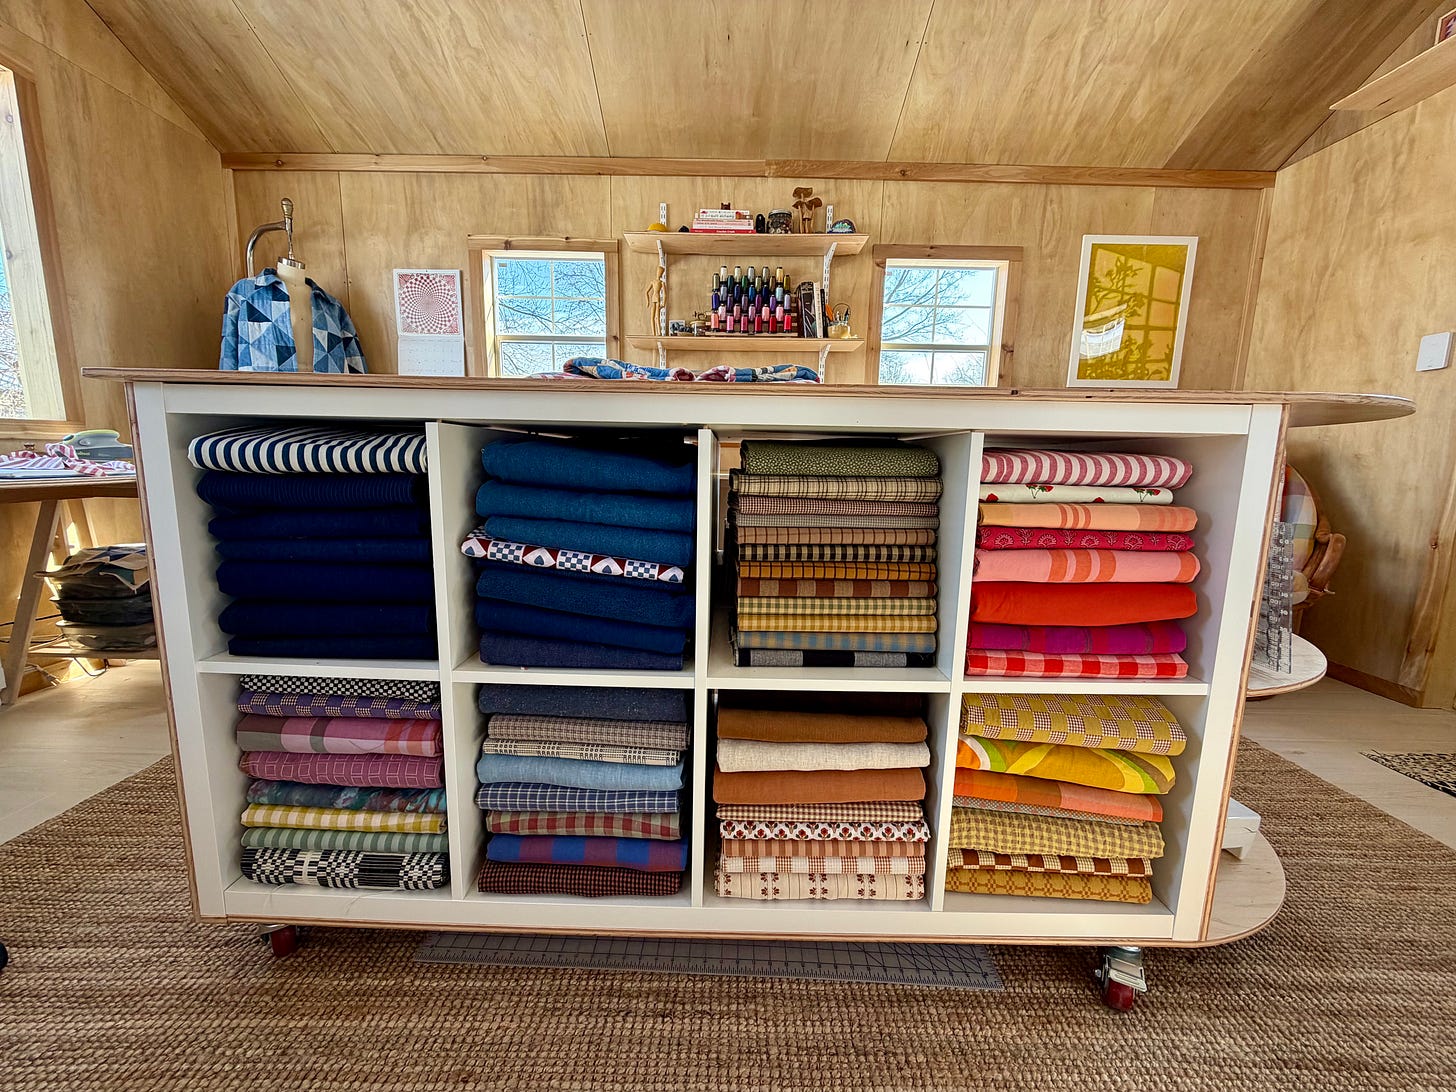
Side 1 of the cutting table is exclusively fabric. Andrew collected some cardboard that we cut down all to the same size, I used those to fold everything to fit neatly on these shelves! 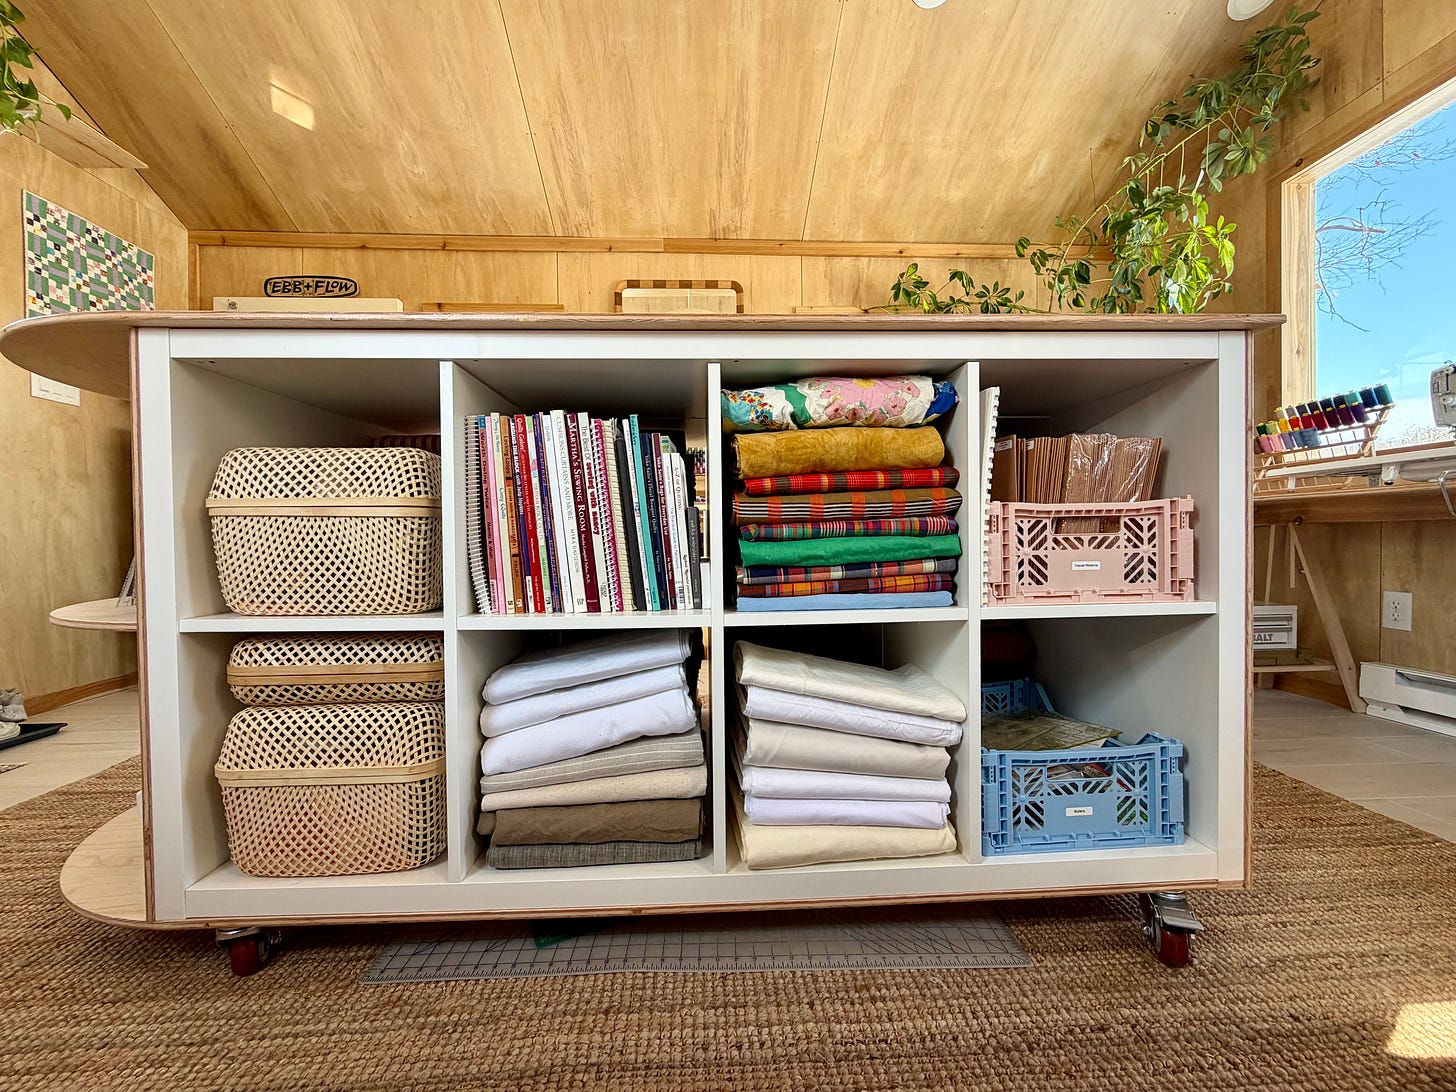
Side 2 has more fabric, baskets with fabric bundles/remnants, more quilting/sewing books and magazines, my traced pattern storage is in the pink Hay basket and the blue Hay basket holds all of my extra cutting rulers/tools. 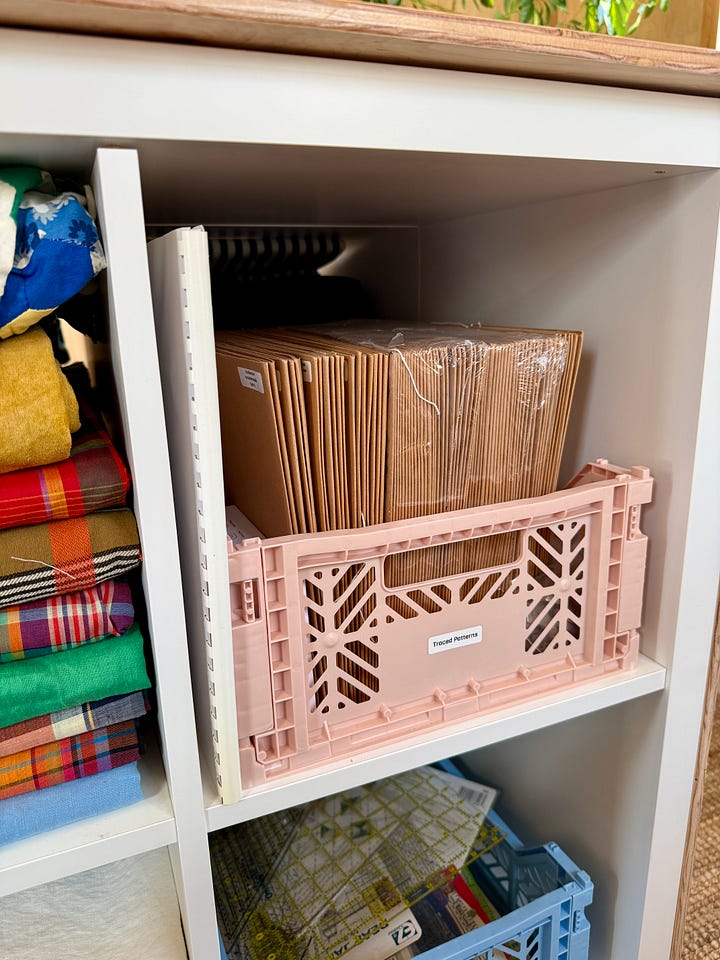
The cutting table holds so much more than I ever anticipated, and I love seeing all of my fabric in one place. My traced pattern storage is pictured above, after tracing whatever size I’m making from my A0 pattern onto Pellon 830 Easy Pattern interfacing, I fold them up and put them into one of these brown folders, then label them with the pattern name, designer, and size, to use again and again. Pellon 830 folds up nicely, but I’ll typically iron my pattern flat to get any creases out when I’m ready to use it again.
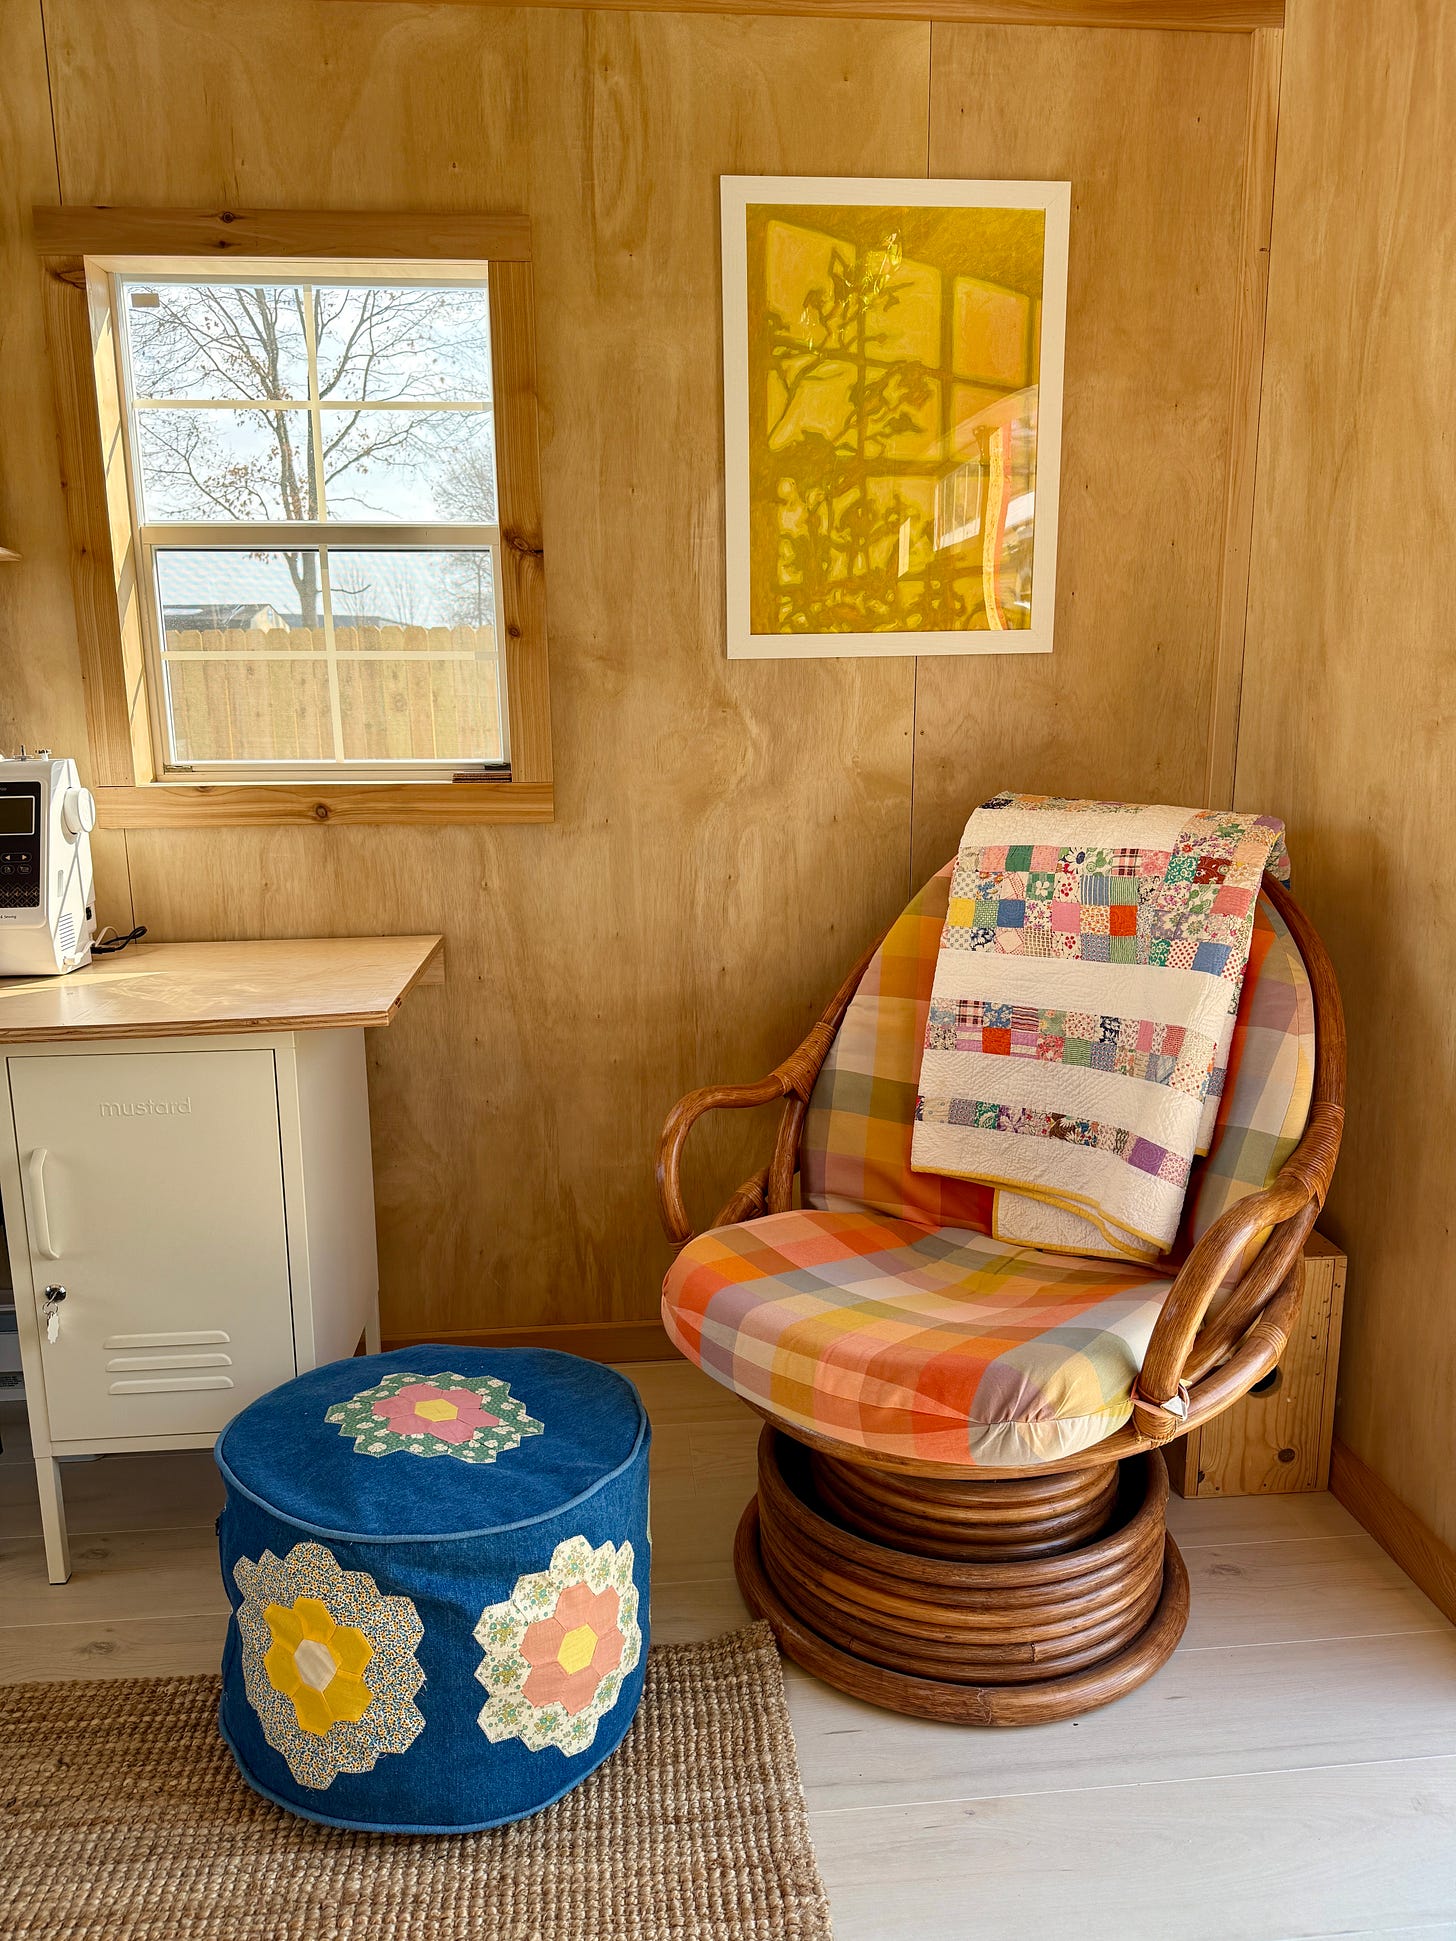
The art print is 'Backyard Light' by Mary Royall Wilgis and the quilt was made by my MIL for my 30th birthday. The pouffe is a recent project I'll share more details on later. The corner where the ‘comfy chair’ lives is Andrew’s favorite. Andrew and I found a set of these chairs at a thrift store when we first started dating, we never loved the original cushion covers (it was a dull tropical floral pattern that just wasn’t really our style) so Andrew’s mom helped me create custom cushion covers for this chair using Fableism fabric this past Fall. I love how it turned out and it is insanely comfortable. After all the hard work Andrew put into the studio, I’m looking forward to him resting and taking a nap or two in this chair while I sew. :)
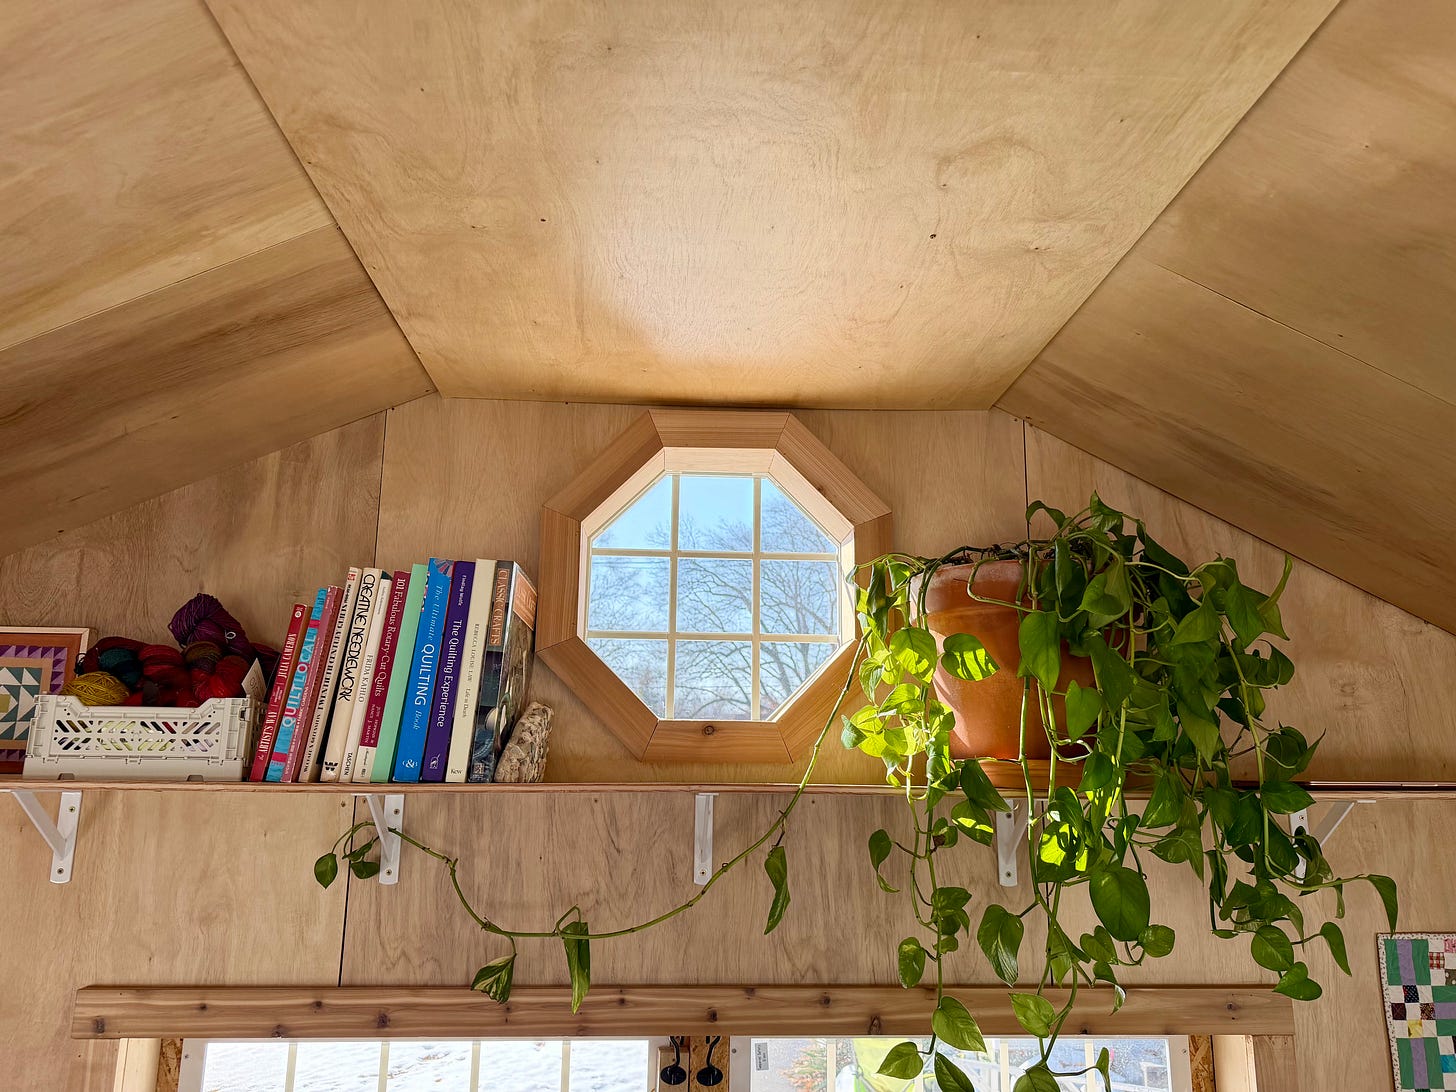
This octagon window above the doors is small but adds so much charm and LIGHT to the space. We added an 8 foot shelf below it where I put a Pothos plant I bought last summer for the space, more books, and some yarn. I’m hoping the Pothos thrives in its new home and wraps along the shelf and wall.
I love this space, and I am so grateful to have it. I have made and finished 4 projects since it’s completion last month, so it already feels well used and worth it for my creative energy to have finally returned. Is there anything else you’d like to see? Do you have a favorite detail? Any must haves I missed in the design? I’d love to hear!
I look forward to continue to share the space with you all as it evolves, thanks for reading!


What a beautiful space! Reading this made me feel inspired and definitely had me dreaming!
Oh my goodness!!! This is AMAZING. What a wonderful space to create in. I’m obsessed.